Creating custom setting / form field
Introduction
This article describes how developer can create your own setting class in X-Cart instead of using predefined ones from the classes/XLite/View/FormField/ folder. For the sake of example, we will create a new page in admin area where we will display our own select-box.
You need to create PHP class for input field in order to be able to define this input field as a setting of your module. It also allows you to re-use this input field. However, you are not forced to use it and are allowed to specify <input> tag right in your templates if you find it convenient.
Implementation
We start with creating a module with developer ID XCExample and module ID FormFieldDemo. Then, we create a page with target=form_field in admin area. During this process, we create:
-
controller class
\XLite\Module\XCExample\FormFieldDemo\Controller\Admin\FormFieldwith the following content:
php
namespace XLite\Module\XCExample\FormFieldDemo\Controller\Admin;
/**
- Form field controller */ class FormField extends \XLite\Controller\Admin\AAdmin
* viewer class `\XLite\Module\XCExample\FormFieldDemo\View\Page\Admin\FormField` with the following content:

```php
php

namespace XLite\Module\XCExample\FormFieldDemo\View\Page\Admin;

/**
 * Form field page view
 *
 * @ListChild (list="admin.center", zone="admin")
 */
class FormField extends \XLite\View\AView
{
    /**
     * Return list of allowed targets
     *
     * @return array
     */
    public static function getAllowedTargets()
    {
        return array_merge(parent::getAllowedTargets(), array('form_field'));
    }

    /**
     * Return widget default template
     *
     * @return string
     */
    protected function getDefaultTemplate()
    {
        return 'modules/XCExample/FormFieldDemo/page/form_field/body.twig';
    }
}
- empty template
skins/admin/modules/XCExample/FormField/page/form_field/body.twig.
Now is the main part: creating class for our select-box class.
We create the classes/XLite/Module/XCExample/FormField/View/FormField/Select/CustomSelect.php file with the following content:
<?php

namespace XLite\Module\XCExample\FormFieldDemo\View\FormField\Select;

class CustomSelect extends \XLite\View\FormField\Select\Regular
{
    protected function getDefaultOptions()
    {
        return array(
            'First value'  => static::t('First value'),
            'Second value' => static::t('Second value'),
            'Third value'  => static::t('Third value'),
        );
    }
}
This is an implementation of simple select-box class. We just define options of this select-box in the getDefaultOptions() method. Our select-box will have three options: First value, Second value and Third value.
In order to display this setting widget on our page, we edit the skins/admin/modules/XCExample/FormField/page/form_field/body.twig template and add the following code there:
{{ widget ('\\XLite\\Module\\XCExample\\FormFieldDemo\\View\\FormField\\Select\\CustomSelect') }}
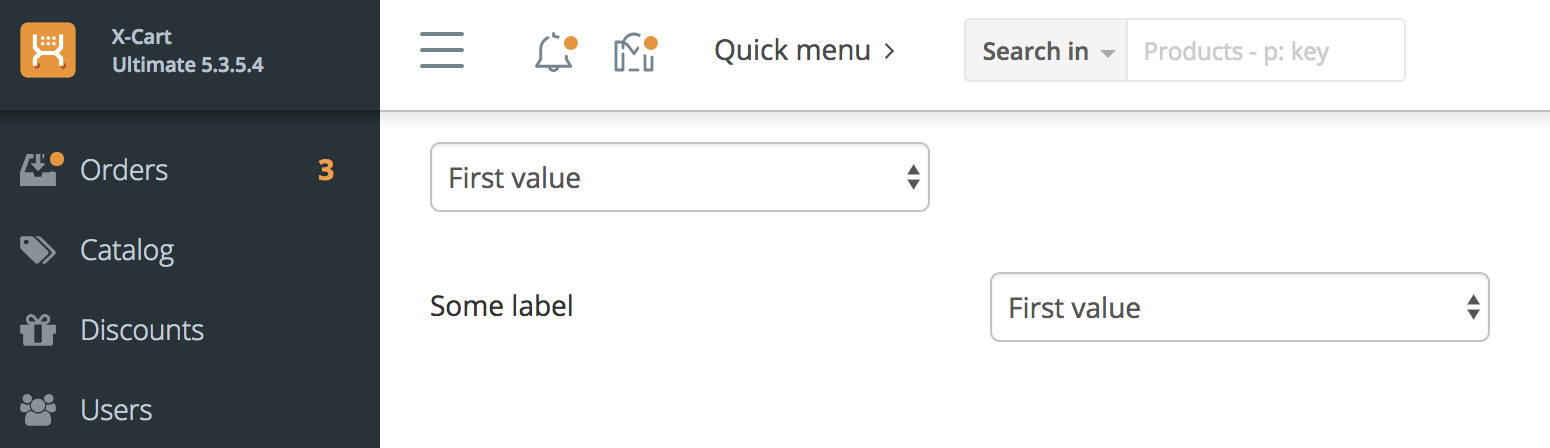
If we leave the code like this, X-Cart will display this setting with missed label:

Instead, we can either define this setting to be displayed without label:
{{ widget ('\\XLite\\Module\\XCExample\\FormFieldDemo\\View\\FormField\\Select\\CustomSelect', fieldOnly=true) }}
or define some label near it:
{{ widget ('\\XLite\\Module\\XCExample\\FormFieldDemo\\View\\FormField\\Select\\CustomSelect', label='Some label') }}
Our module pack contains both variants, so you will see the result like this: